HOW TO | Build a Workbench on a Budget
A workbench is an essential addition to any workshop. And building a DIY workbench does not come much easier than this, or cheaper. With a goal to build an affordable workbench, here’s a great way to give your workshop a boost.
Timeframe: 2-3 Hours | Tools Required: Circular Saw, Drill , Straight Edge / Guide, Toolbelt (tape measure, hammer, pencil) | Materials Required: 3x Door leafs of same/similar size, 2x 400x50mm timber offcuts (approx size), Fixing Screws, Wood glue

Step 1: Confirm your Plans
Before cutting, make sure you have your sizes and dimensions right. Your workbench size will vary depending on the size of doors you have and your preferences.
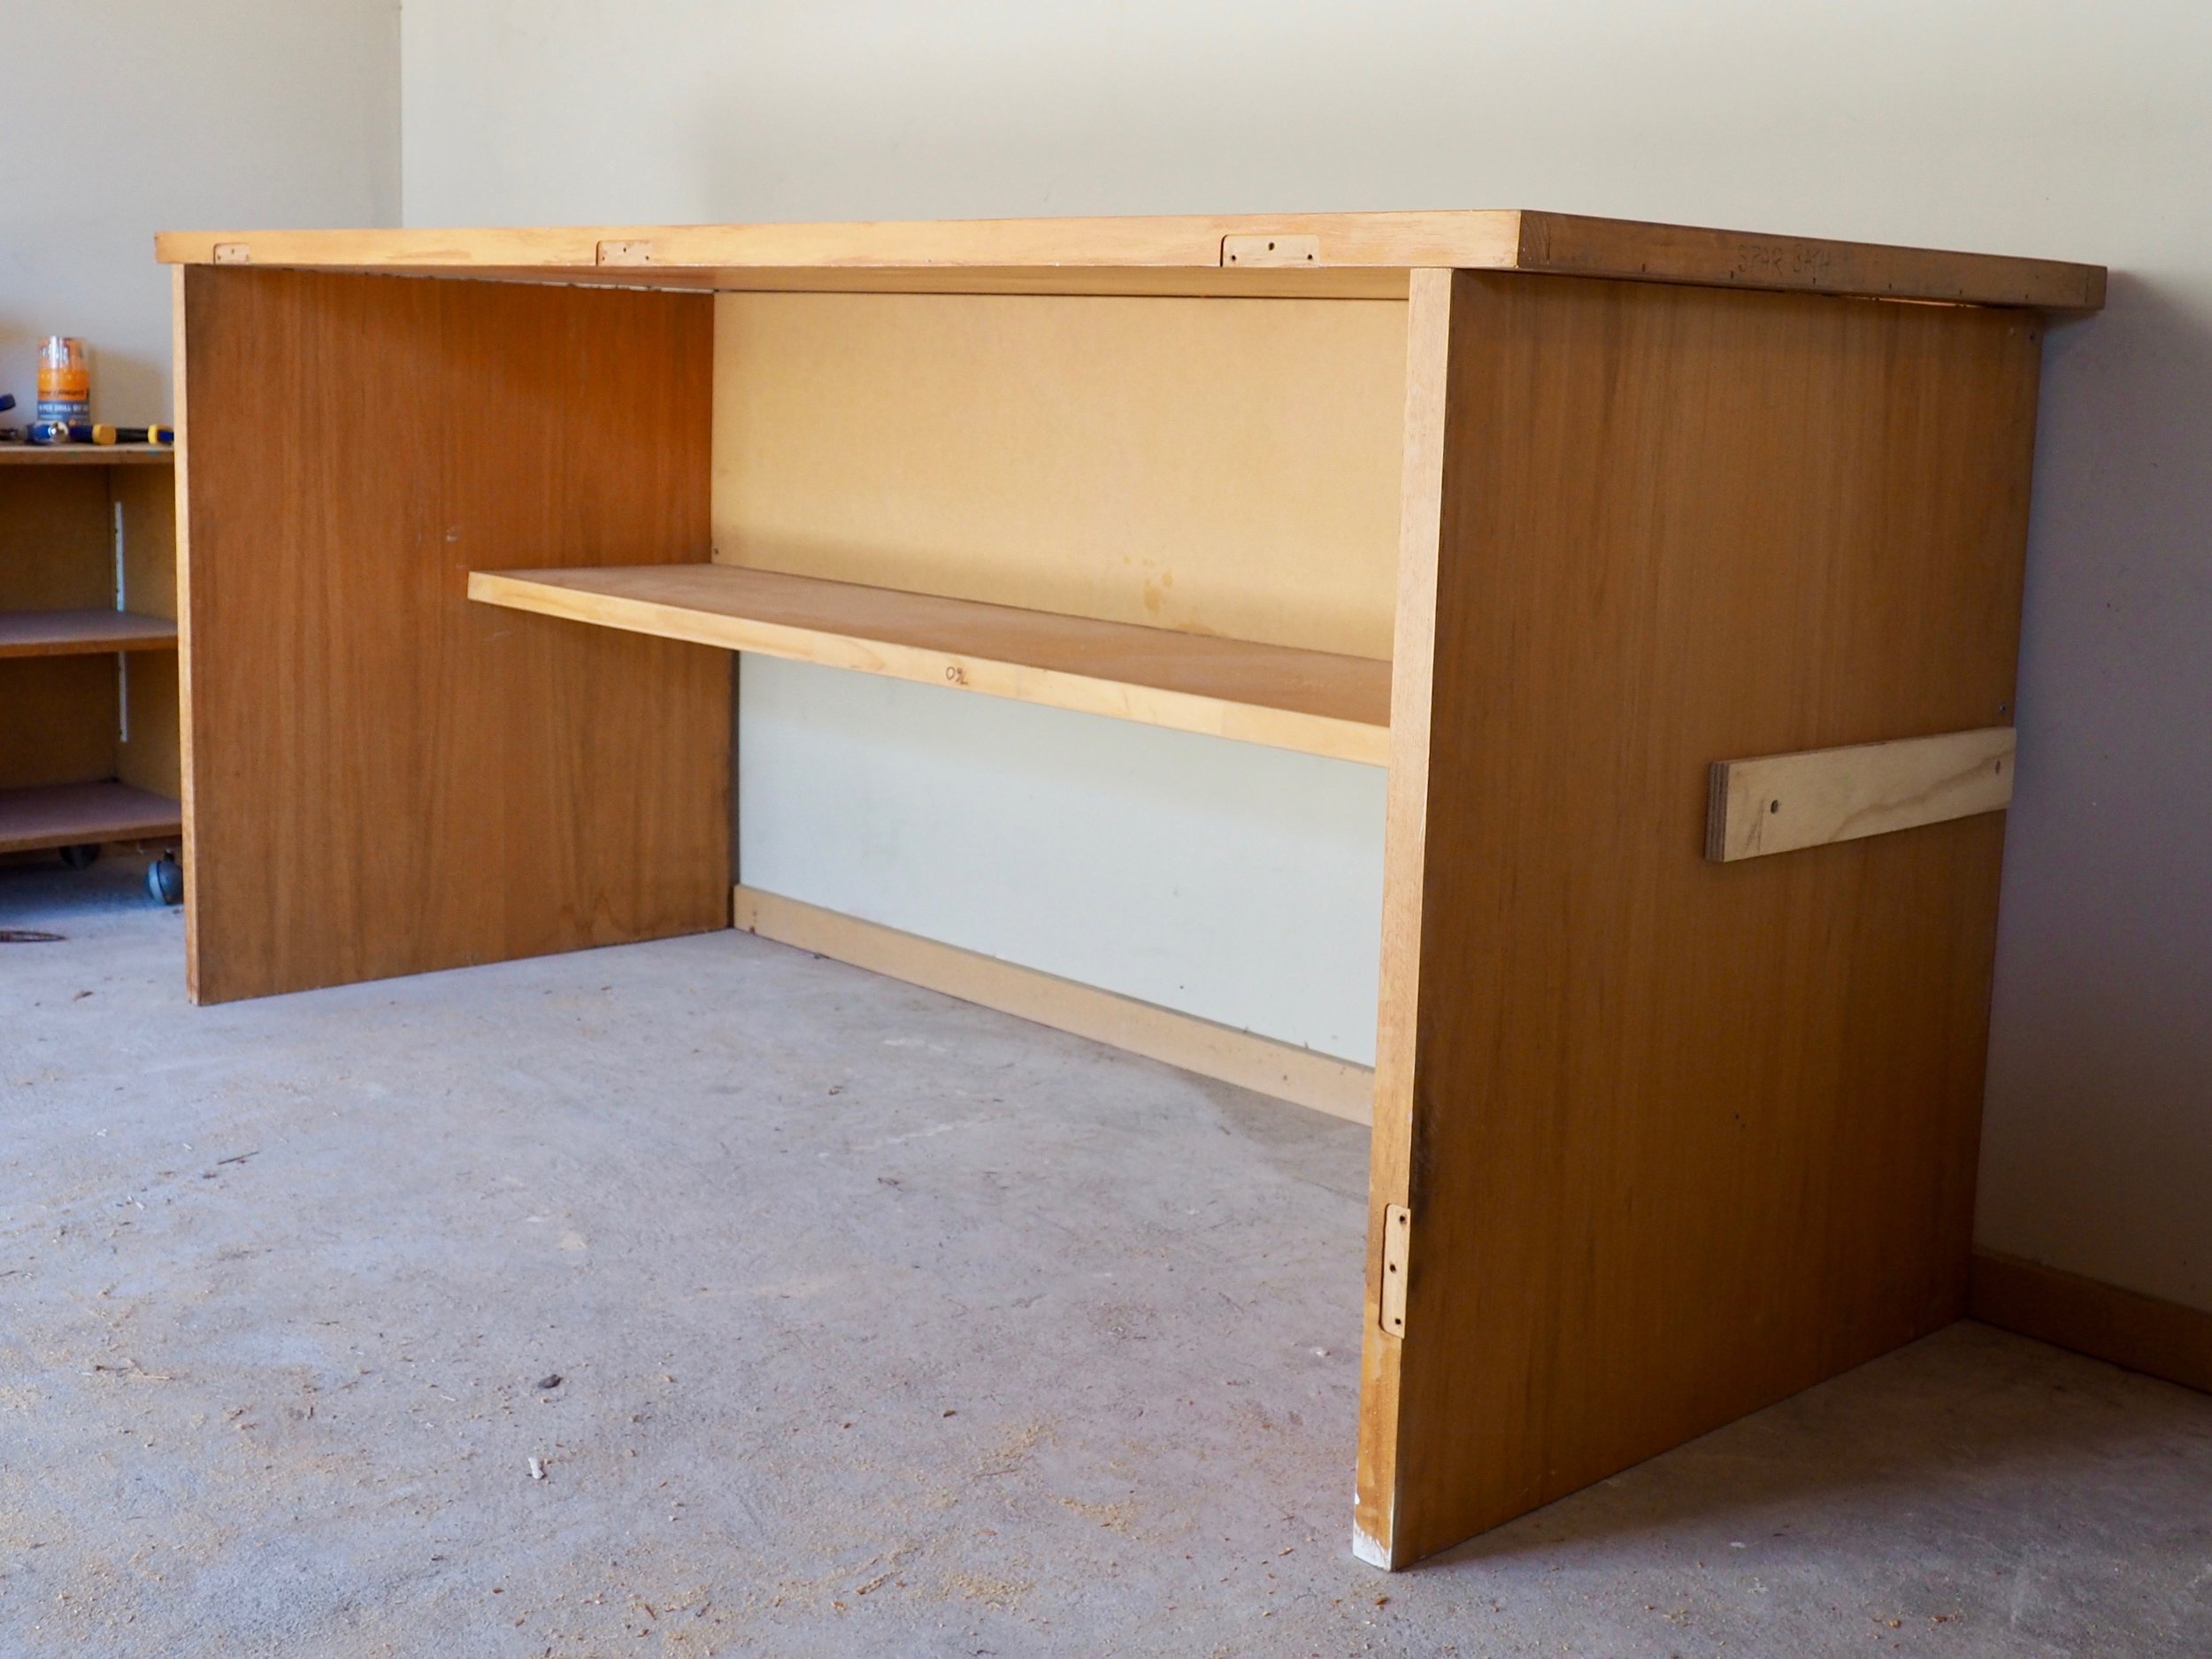
This workbench started with 3 standard doors leafs - each door was 1,960 x 760 x 35.
Top - One door remains uncut as the workbench top.
Sides - Measure the 2 sides at 865mm each, to achieve a 900mm high workbench surface. Cut from each end of the door.
Mid-Shelf and vertical bracing - Measure one door lengthwise to become 400mm wide (mid-shelf) and 360mm wide (back wall/bracing). This will create the shelf surface at 500mm high. The back wall will become the bracing for the workbench. These 2x pieces have been shortened to 1,800 long to create an overhang at each end - for picking up and moving the workbench.
Step 2: Cut your Doors
Once your measurements are confirmed, use a circular saw to make your cuts. Use a guide, or a straight edge clamped down, to get a straight cut.
Step 3: Add Fixing Blocks
If you are using a hollow core door, then you will need to add fixing points where you have cut the door. The perimeter of a hollow core door is framed, but the inside is typically honeycombed cardboard. Add fixing blocks to cut edges where honeycombed cardboard is exposed and you will be screwing through or into - these are needed as fixing locations. Use offcuts from the door (or timber offcuts), cut to size to fit within the door hollow, tap in blocks to fit where cardboard is located, then glue and screw in place. If you are using solid doors, this step is not required.
Step 4: Screw and Fix
Use suitable screws to fix the mid-shelf and back together.
Screw the sides to the mid-shelf. You will be screwing through the ‘hollow’ part of the door to fix the mid-shelf to the sides. Use a large washer or a strip of timber to ensure screws do not get pilled through the door.
Screw the workbench top into the base, making sure the screws are flush with the surface.
Cost:
3x Doors - $60. This may vary depending on what you can source locally.
Final Cut List:
1x full door for workbench
1x door: Cut into 2x sides at 865mm High
1x door: Cut into 2x lengths at 400mm Wide and 360mm wide. 1,800 long. Used for mid-shelf/bracing.
2x 400x50mm (approx) timber offcuts.
Offcuts for fixing blocks.
Additional Customisation:
Height. The height of the workbench and mid-shelf is easily adjustable to suit your preference.
A hollow core door can carry sufficient weight for a workbench, but not great at point loads. Consider adding an extra skin on top of the workbench for added strength - ply, custom wood, etc. Alternatively use a solid door for the workbench surface.
Lockable wheels are a great addition to any workbench. Allowing you to move around for working and cleaning.
Use a pocket hole jig to screw the workbench surface from underneath and have hidden fixings.