
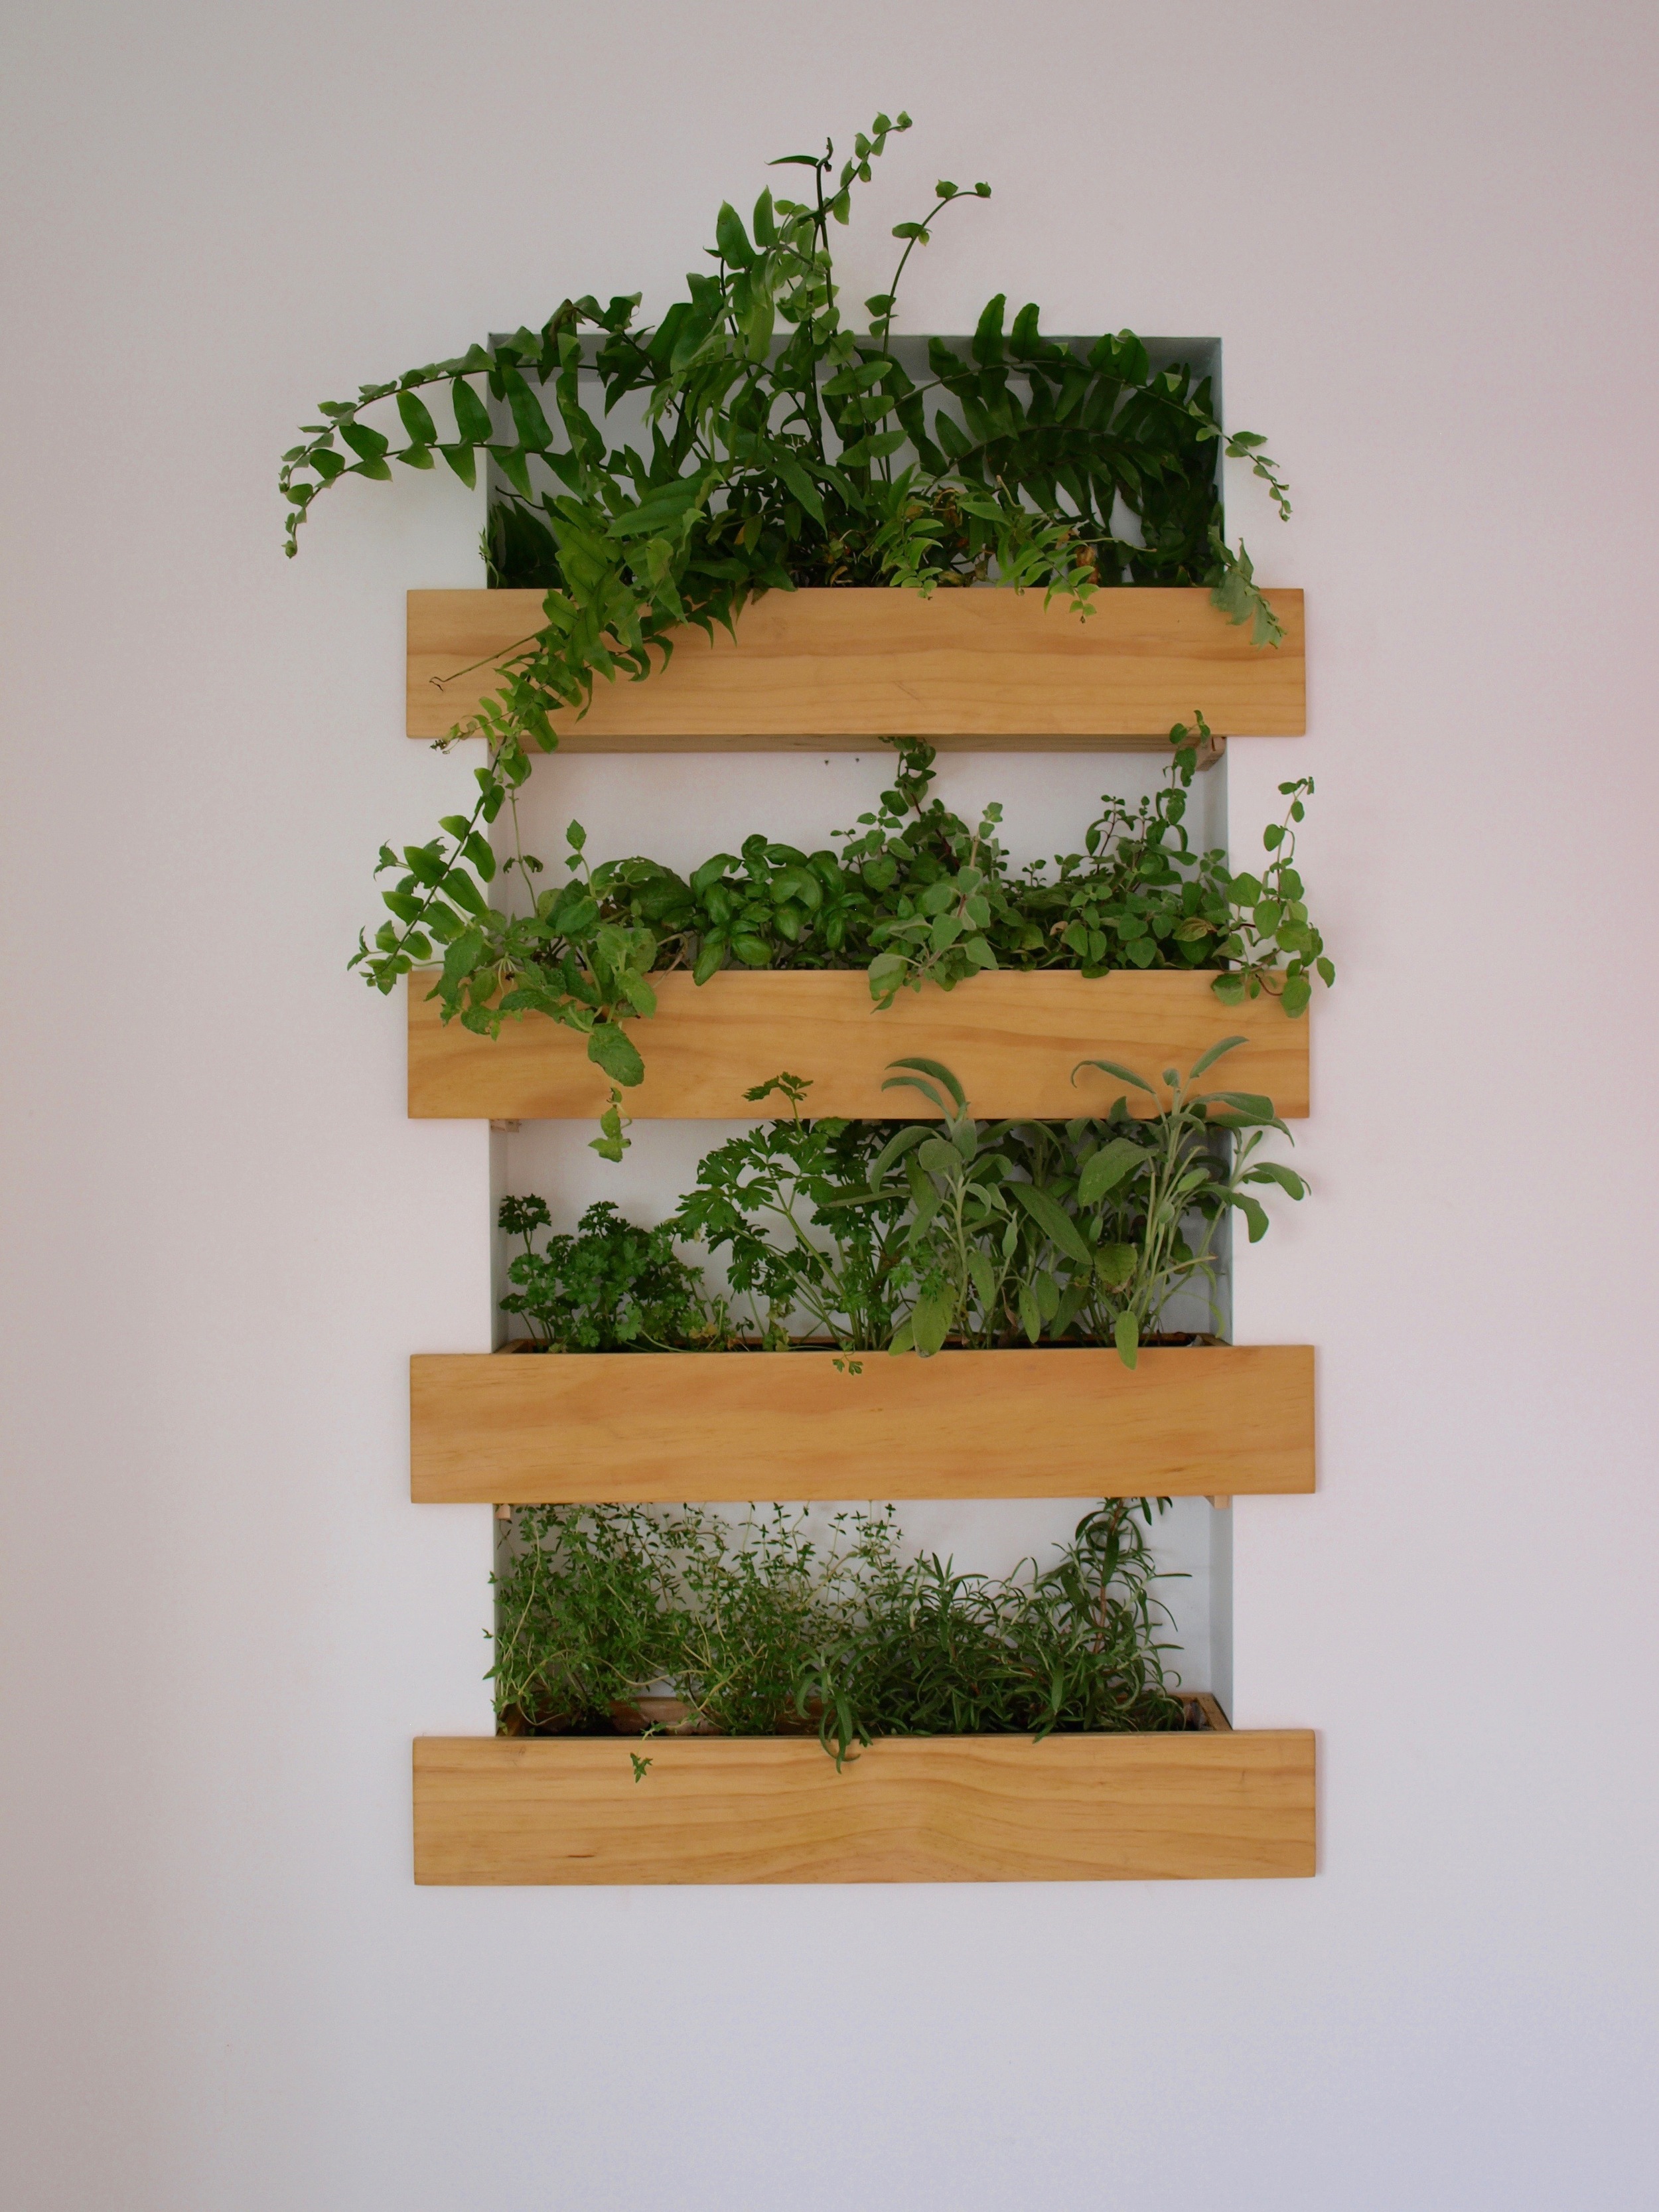
DIY Project | Recessed Planter Box
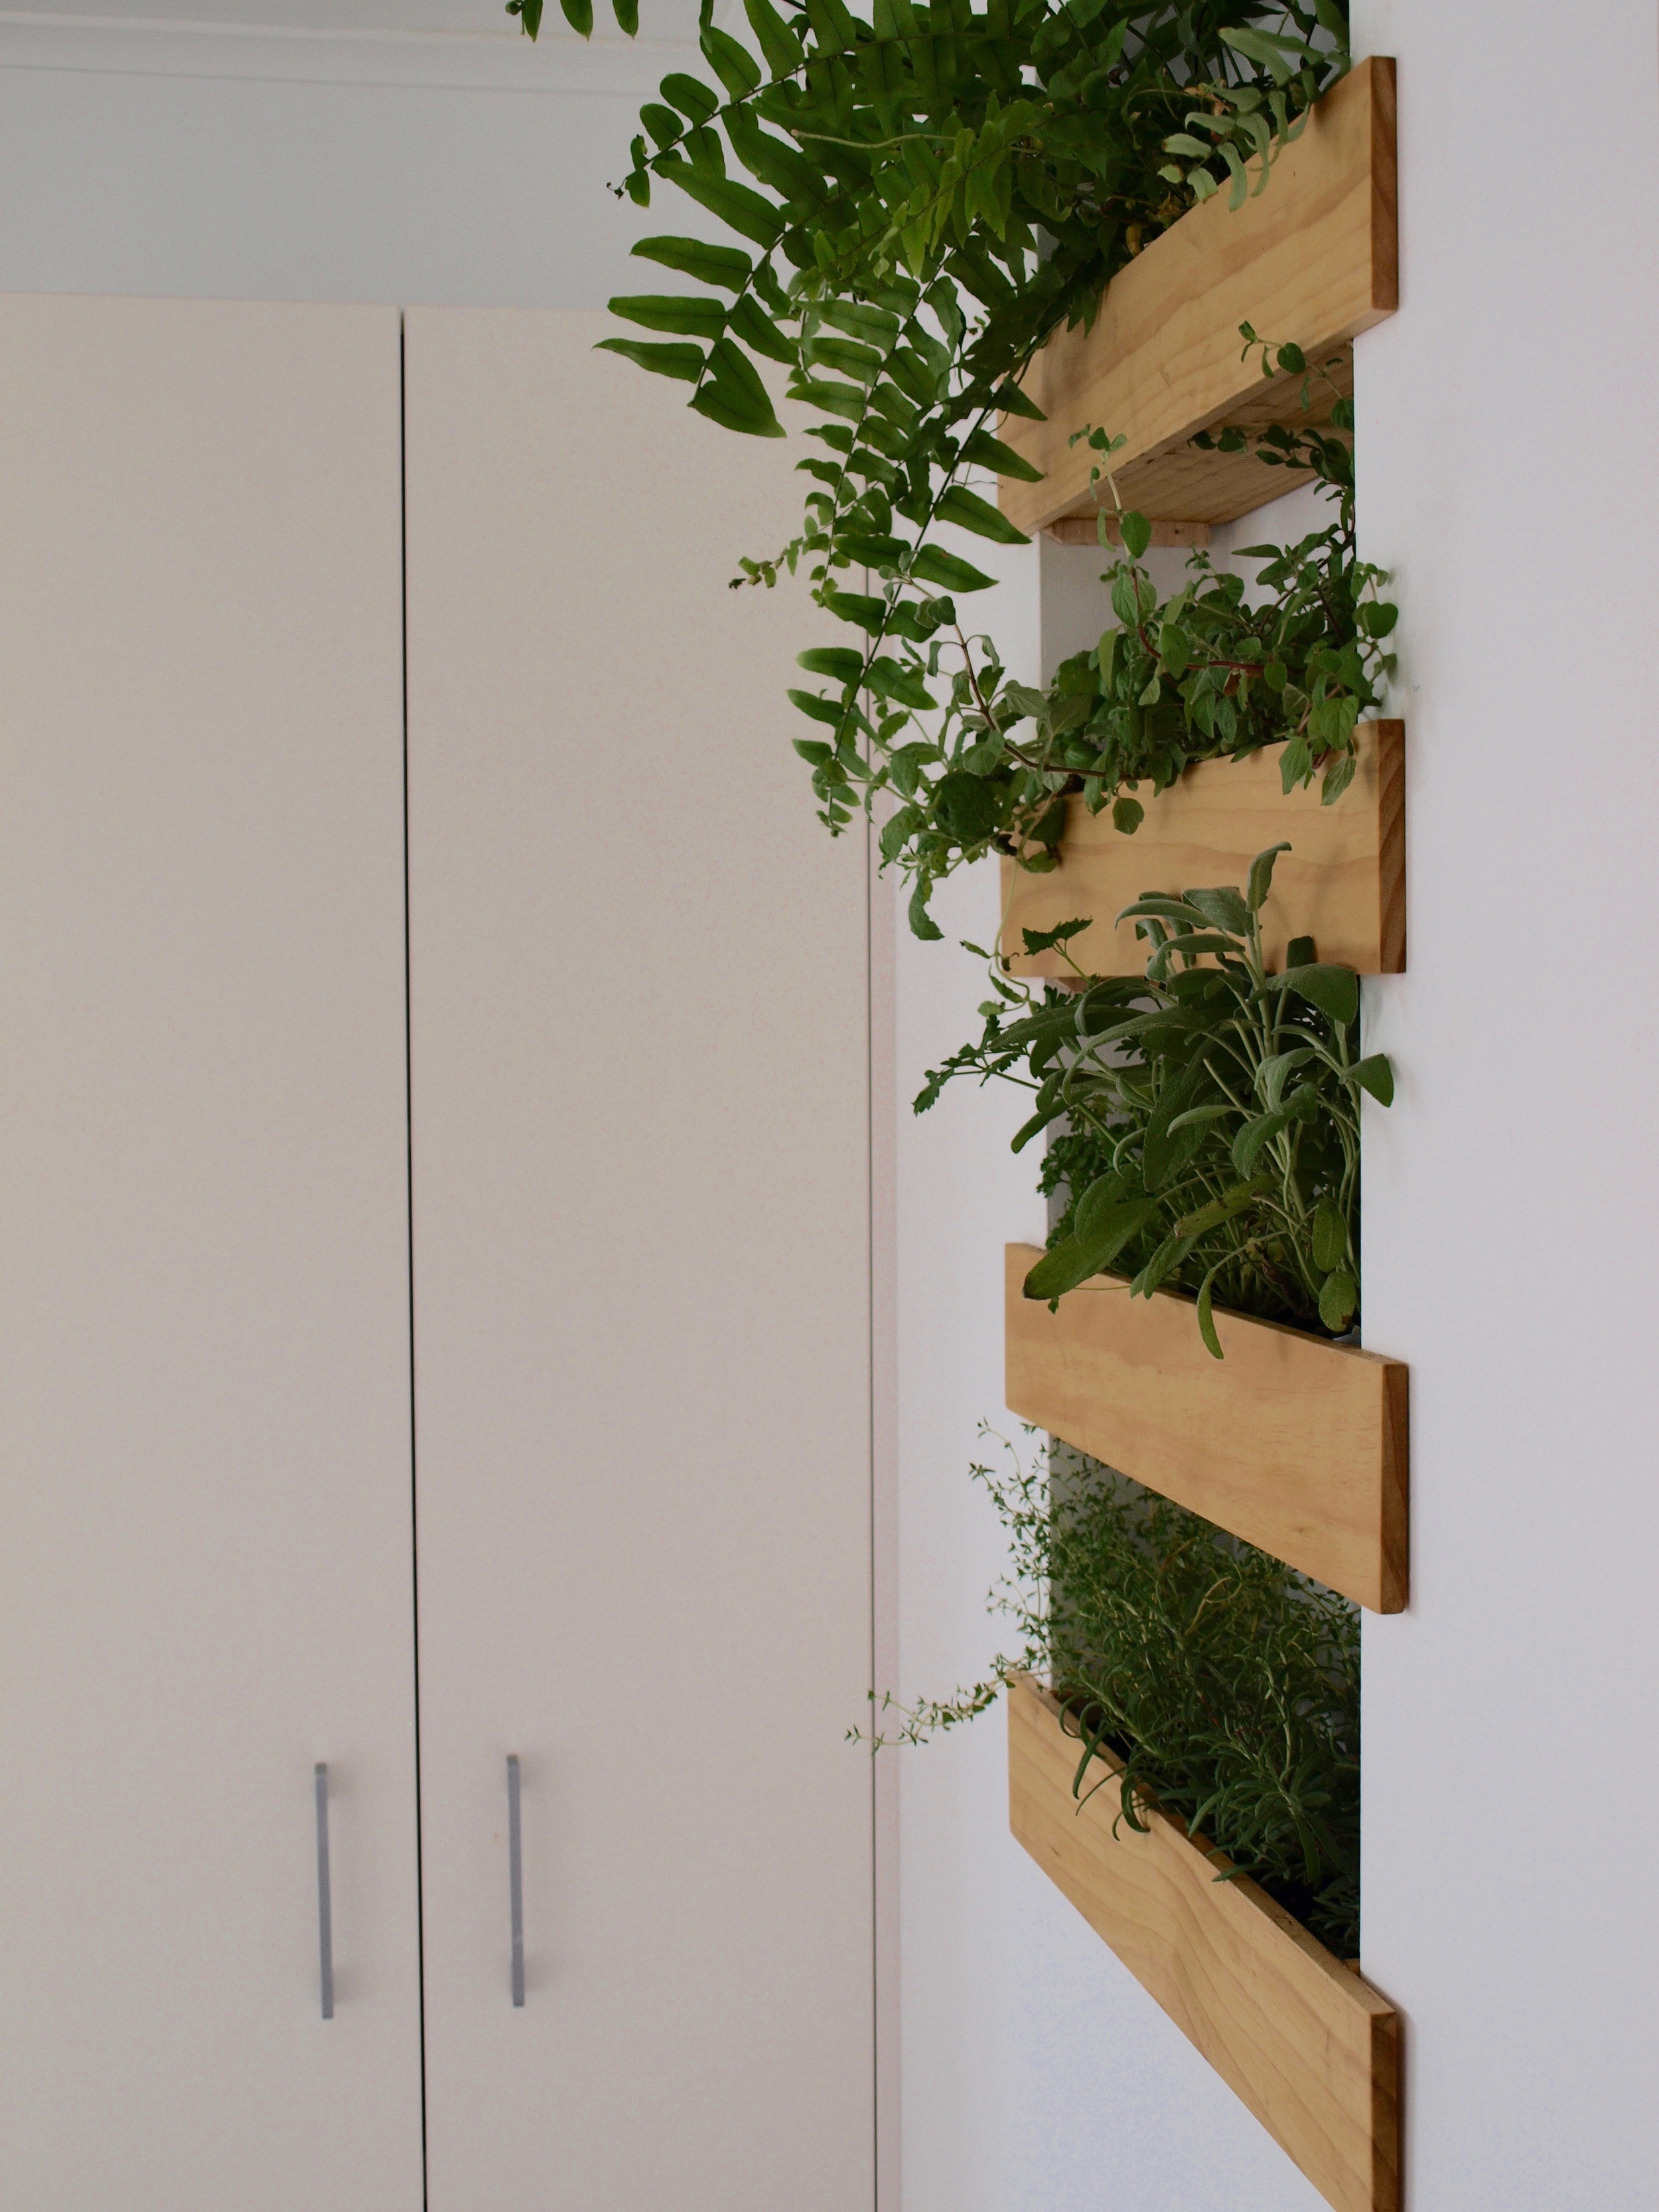
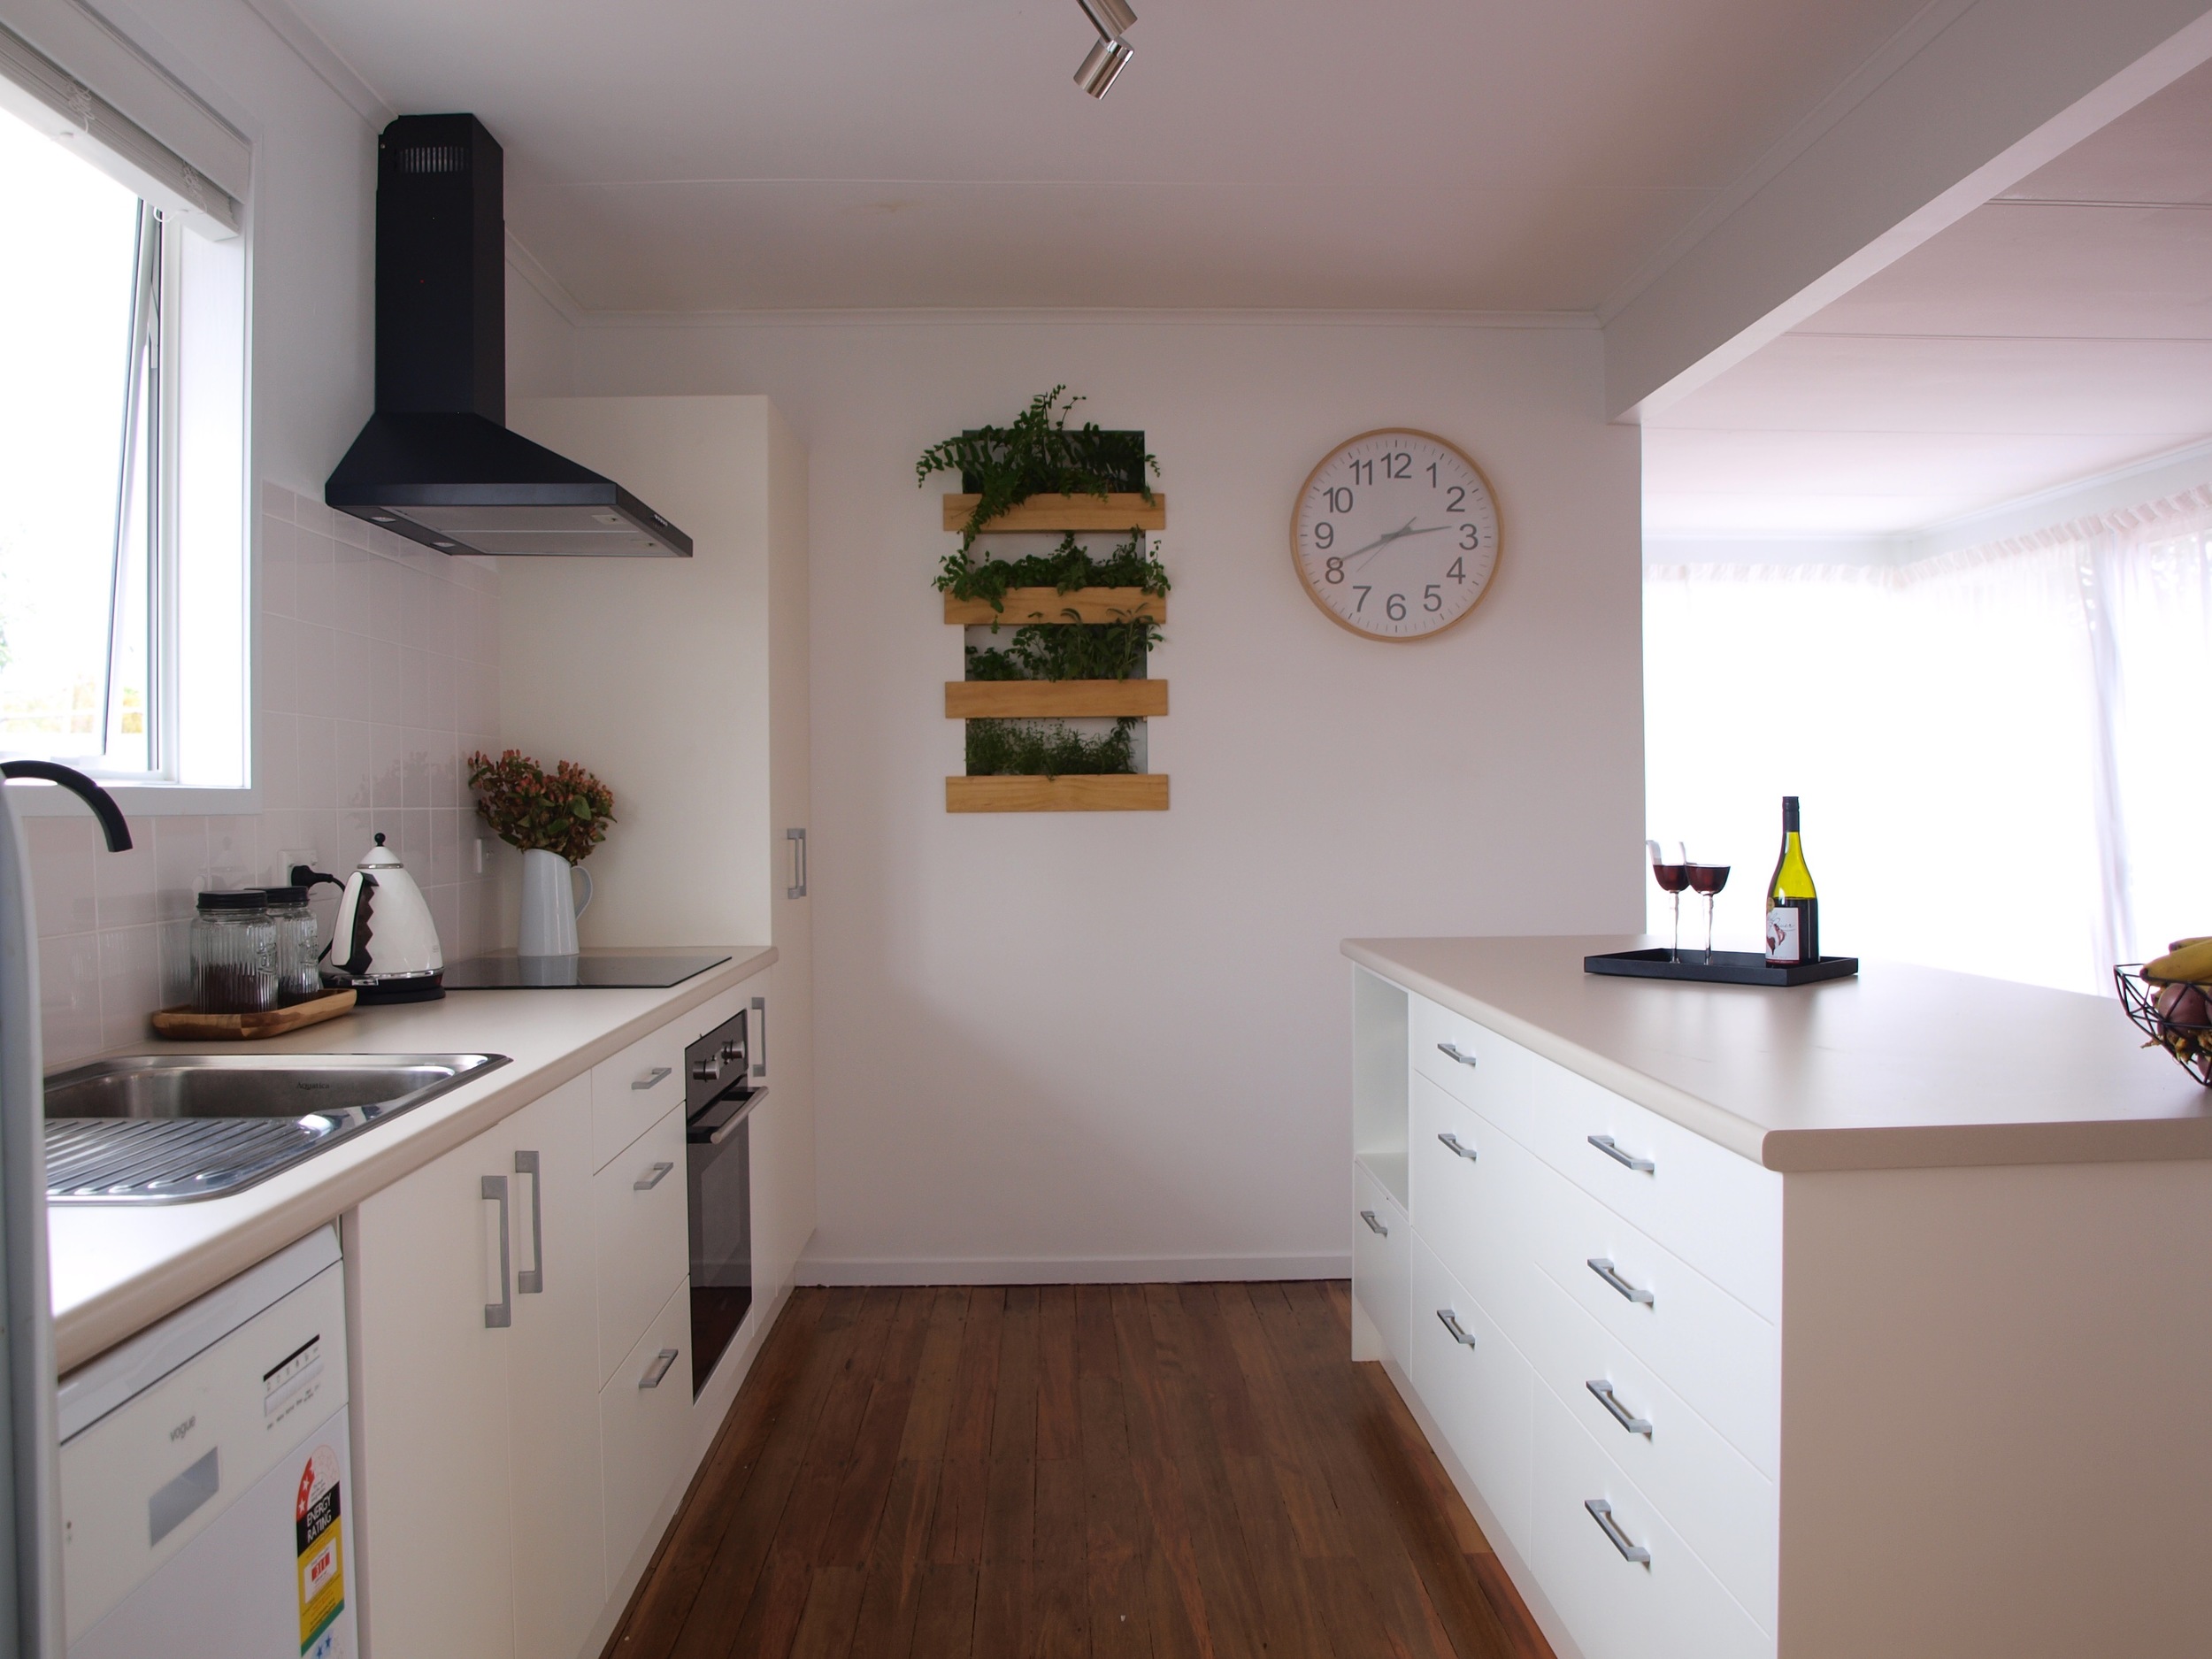
Interior plants can soften a room and add life to your spaces. Its great to see the popularity and creativity of ways to bring plants into interior spaces in recent times, both in office spaces and homes. With an opportunity to create a kitchen feature as part of a house renovation, a green herb wall was the perfect option. With the wall linings removed we had the ability to create a recessed niche between the studs to do something we hadn't seen before. Here's how:

Steps.
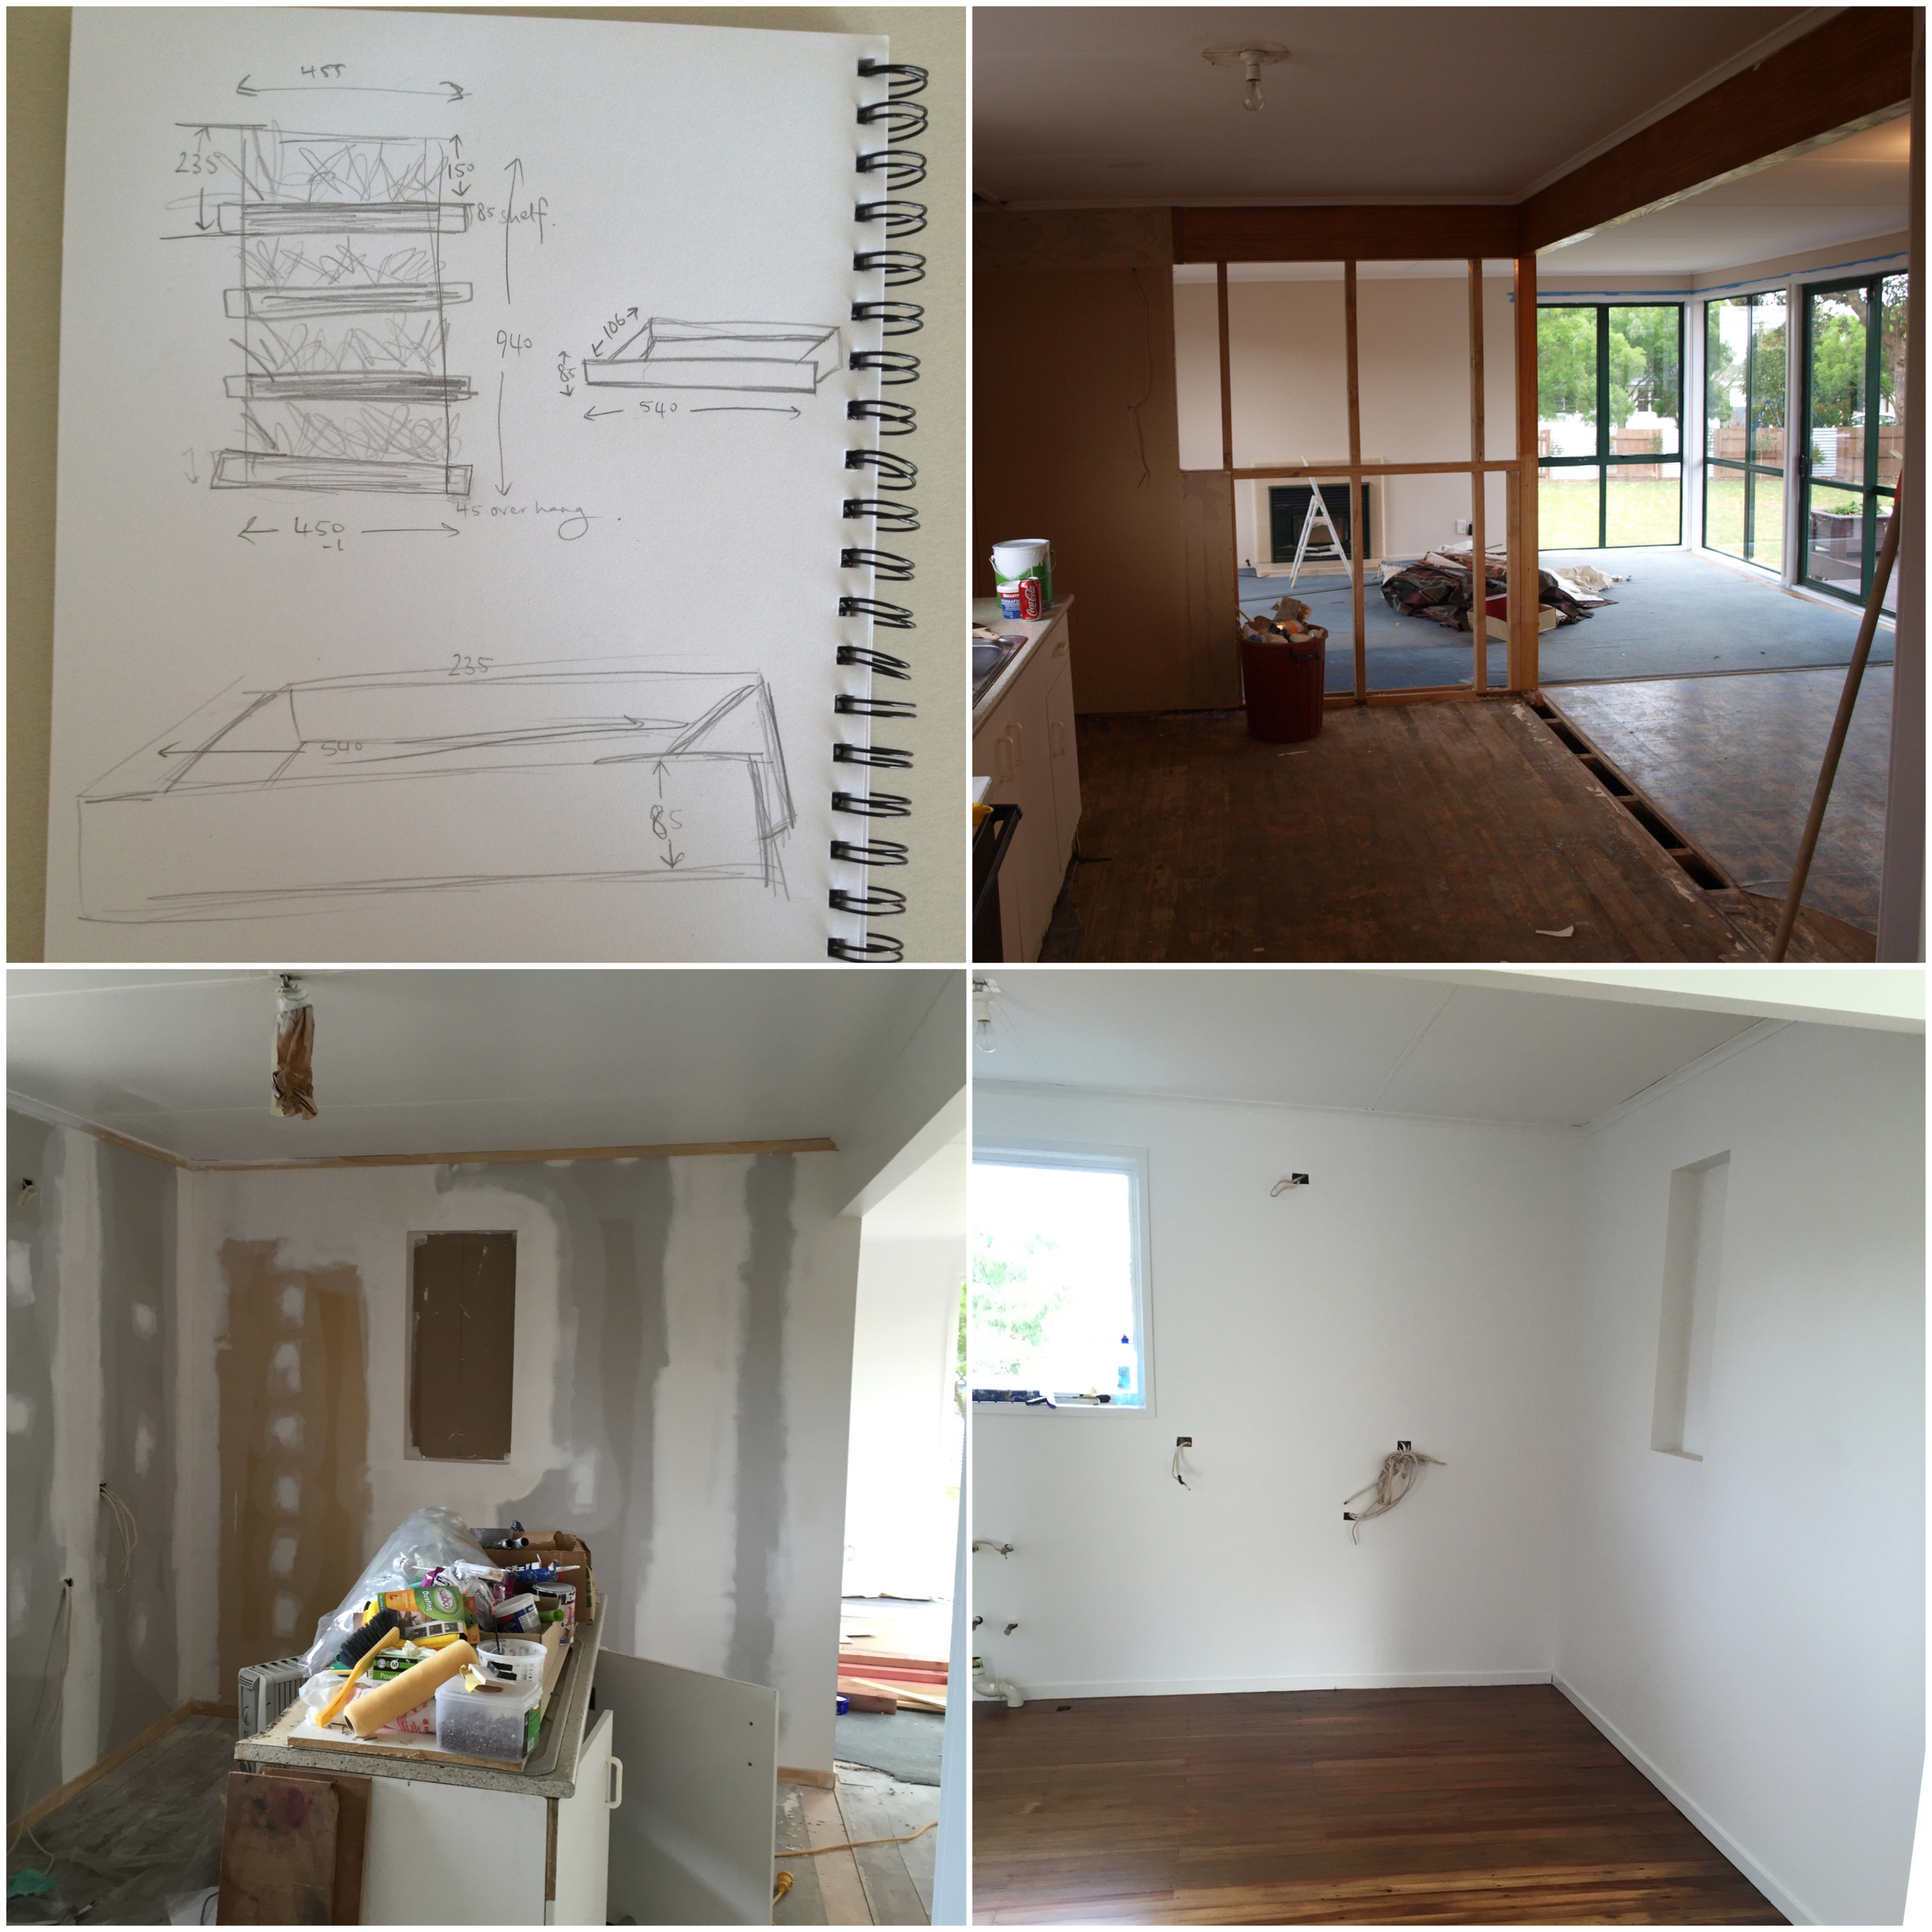
1. Make a plan. Design your recess, the amount and size of planter boxes. Before starting, confirm the dimensions and location of your recess. Due to the ability to create a nook to a size that suits your space and preference, I will avoid reference to specific dimensions in this guide.
2. Create the recess. If your walls are unlined, place timber nogging to the top and bottom. Using the studs as sides is an option as I have done, alternatively add in additional timber to create the width your after. Line the inside walls with gib board and plaster.
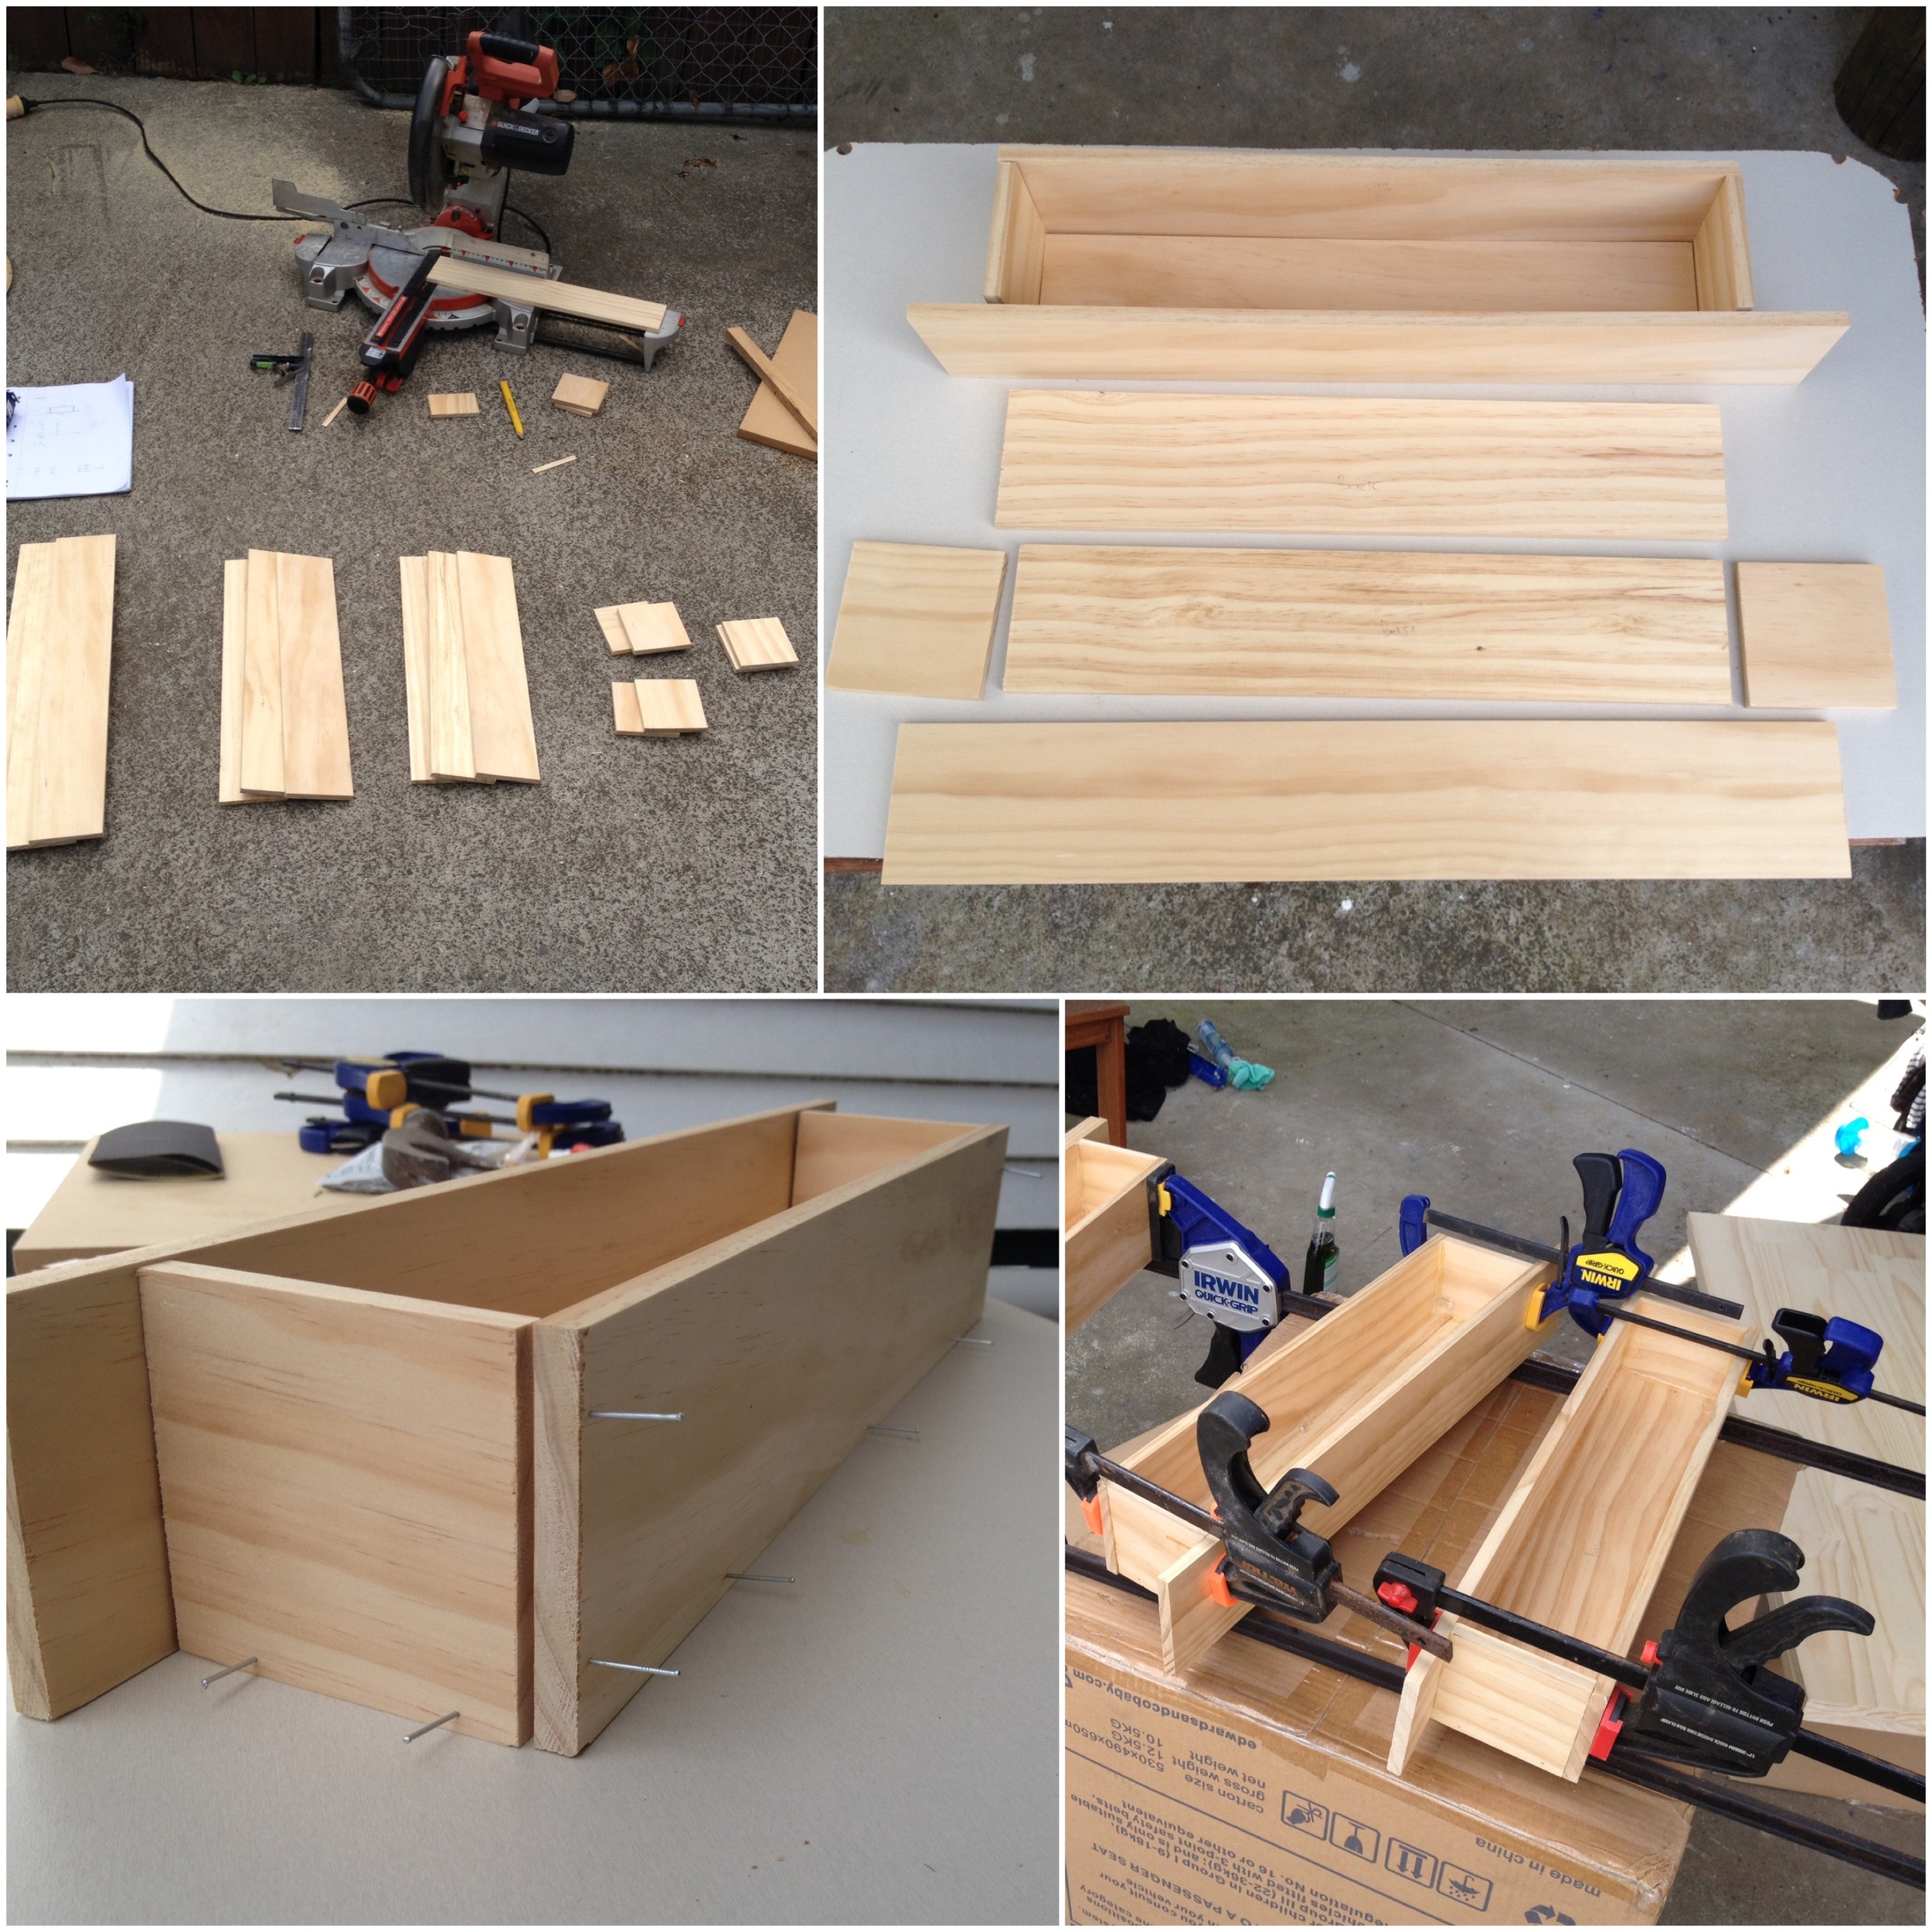
3. Build the planter boxes.
- Cut sides, front, back and base of your planter boxes - based on the measurements you have. To minimise waste and cuts, I purchased 90mm wide strips of pine and made the height of the boxes 90mm.
- Check that your cuts are accurate and also fit within your recess before joining together.
- Using pin nails and glue, fix the sides and base of the planter box together.
- Using a suitable timber glue, join the front panel to the planter boxes and clamp together. Leave clamped for time recommended on the glue.
- Sand off edges where needed and give the outside a sand to ensure smooth.
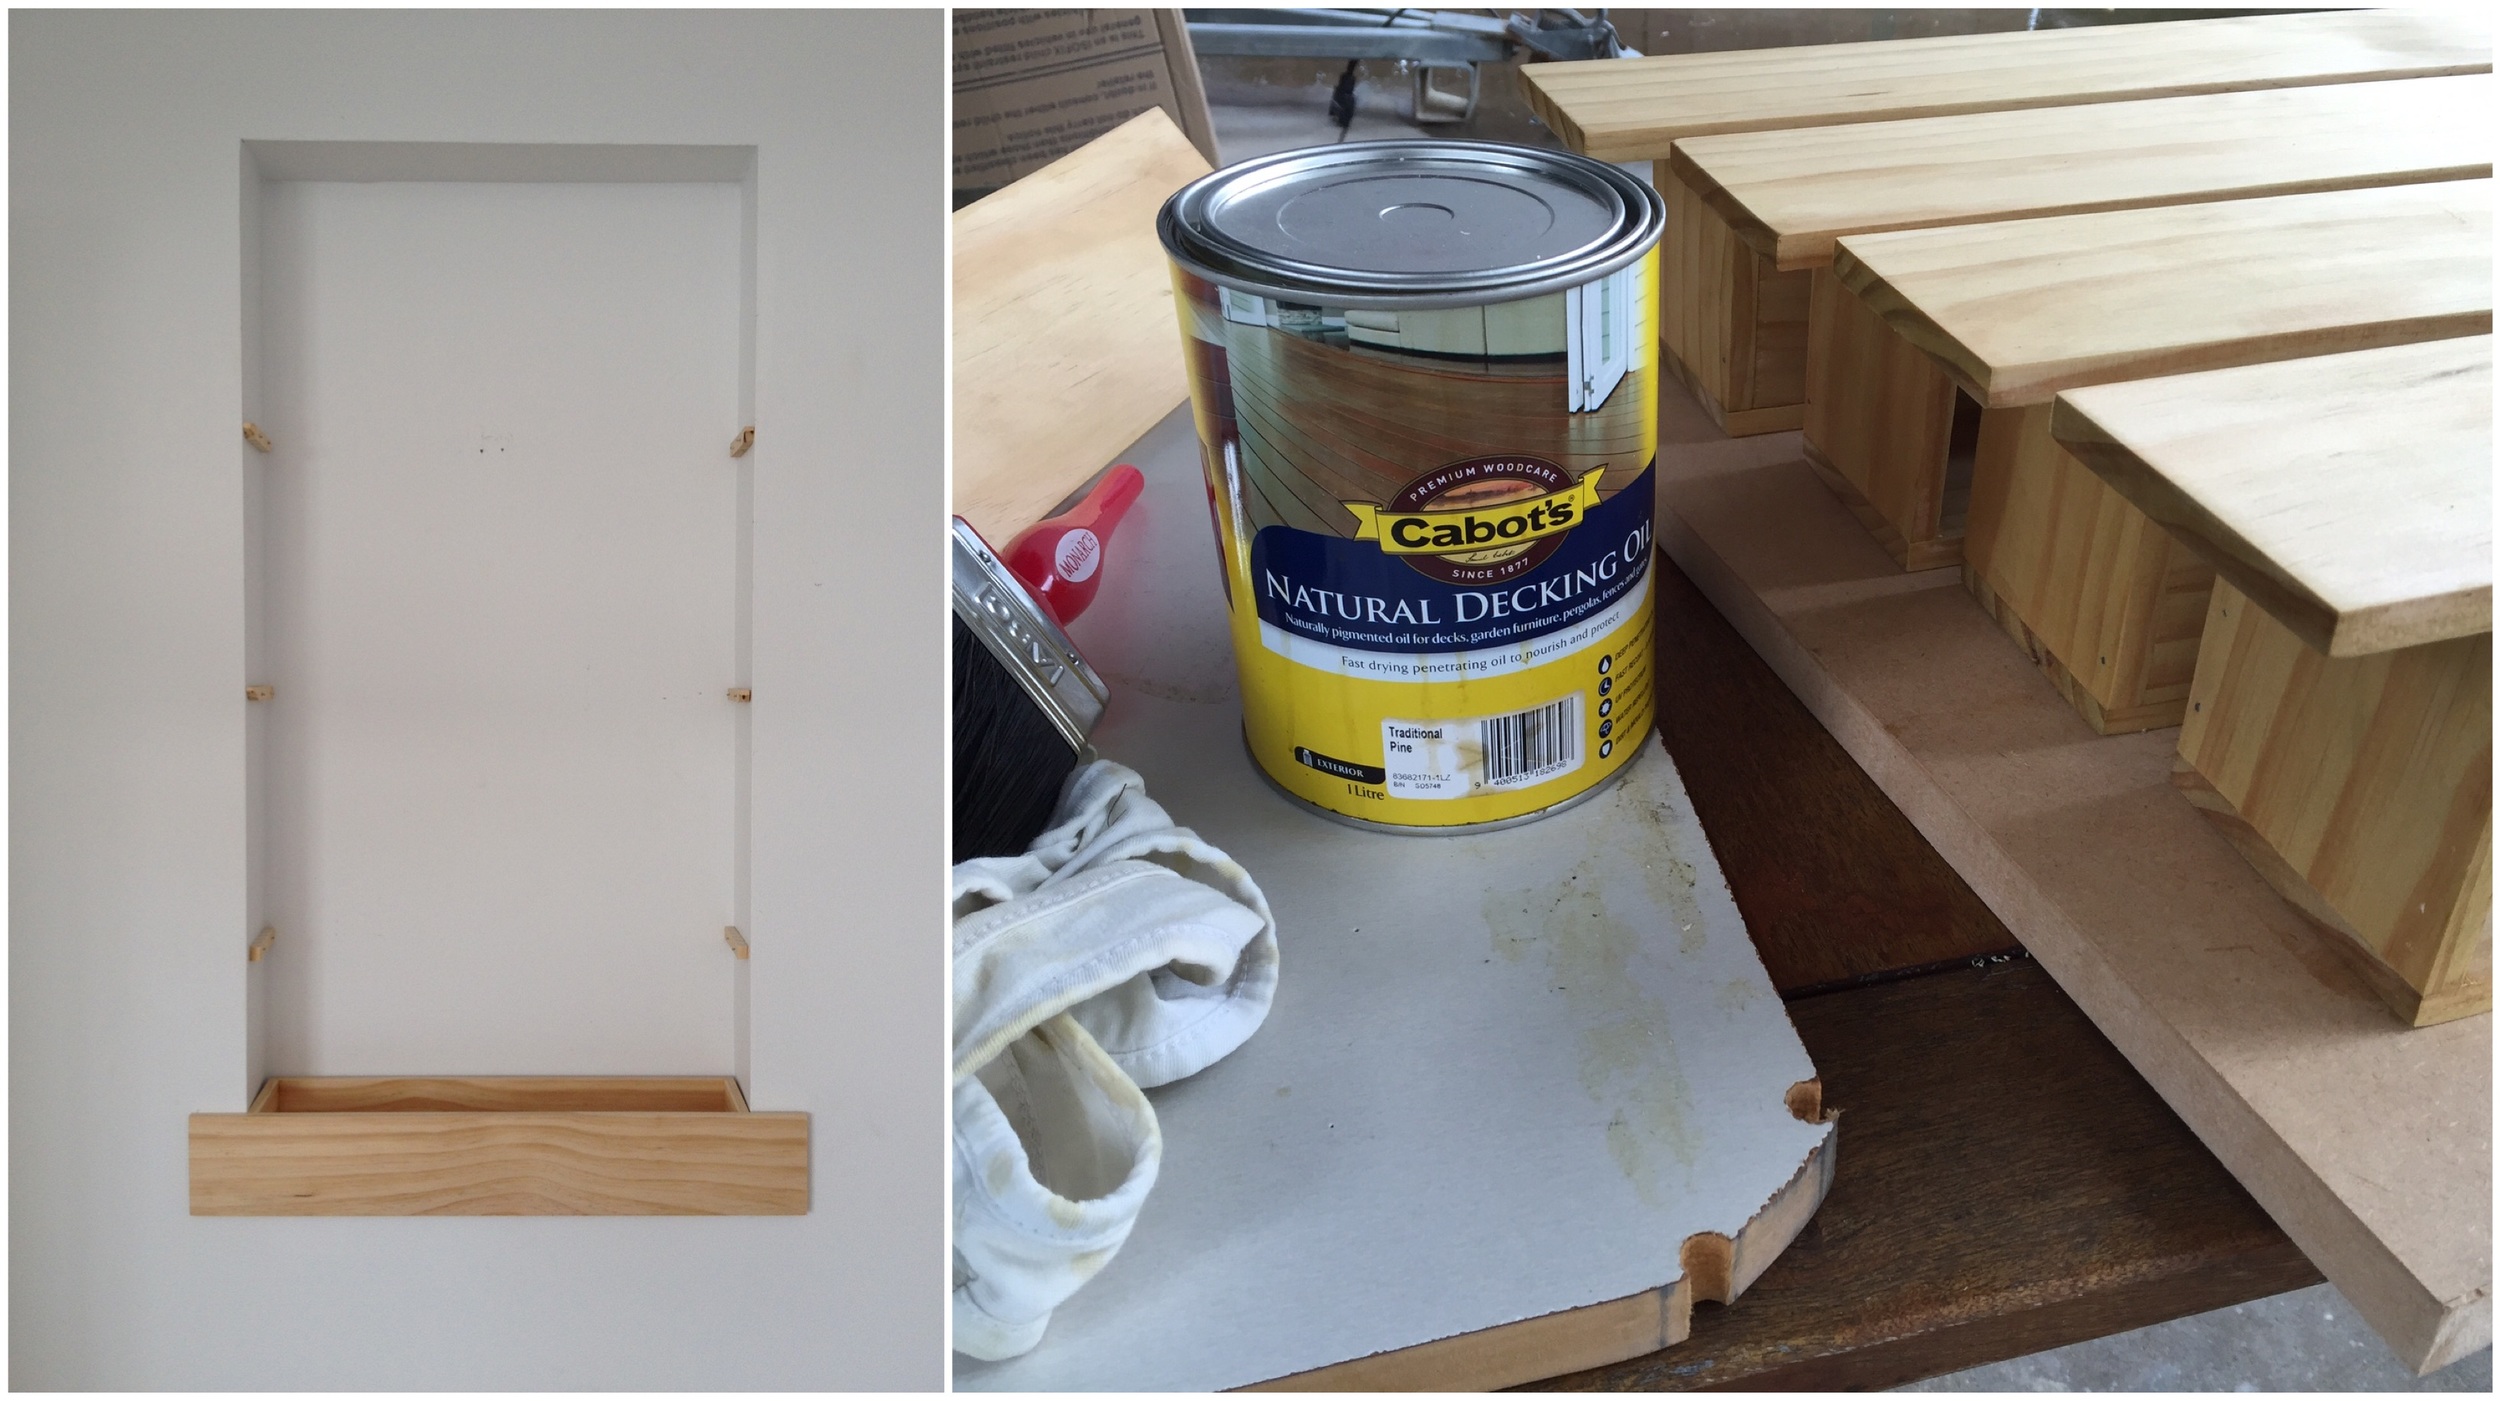
4. Create and fix brackets. Fix brackets under each side of the planter boxes which the boxes would sit on - this will allow the boxes to be removed easily for replanting, maintenance and cleaning. Alternatively screw the planter boxes through the sides into the studs - this will hide the fixings, but make removing the boxes more difficult.
- Using timber offcuts from the planter box, cut 10mm x 90mm strips of timber, 2x per planter box.
- Measure spacings of planter boxes and placement within your recess, mark with a pencil correct heights and check level.
- Fix brackets securely into studs either side of recess.
5. Finish the planter boxes. Exposed wood can absorb moisture and stains easily, so a form of finish is recommended. Choose one which suits your style - oils, stains, gloss or paint. We went with a oil to maintain the original pine colour as near as possible. Apply the finish based on the products recommendation.
6. Line the planter boxes and plant.
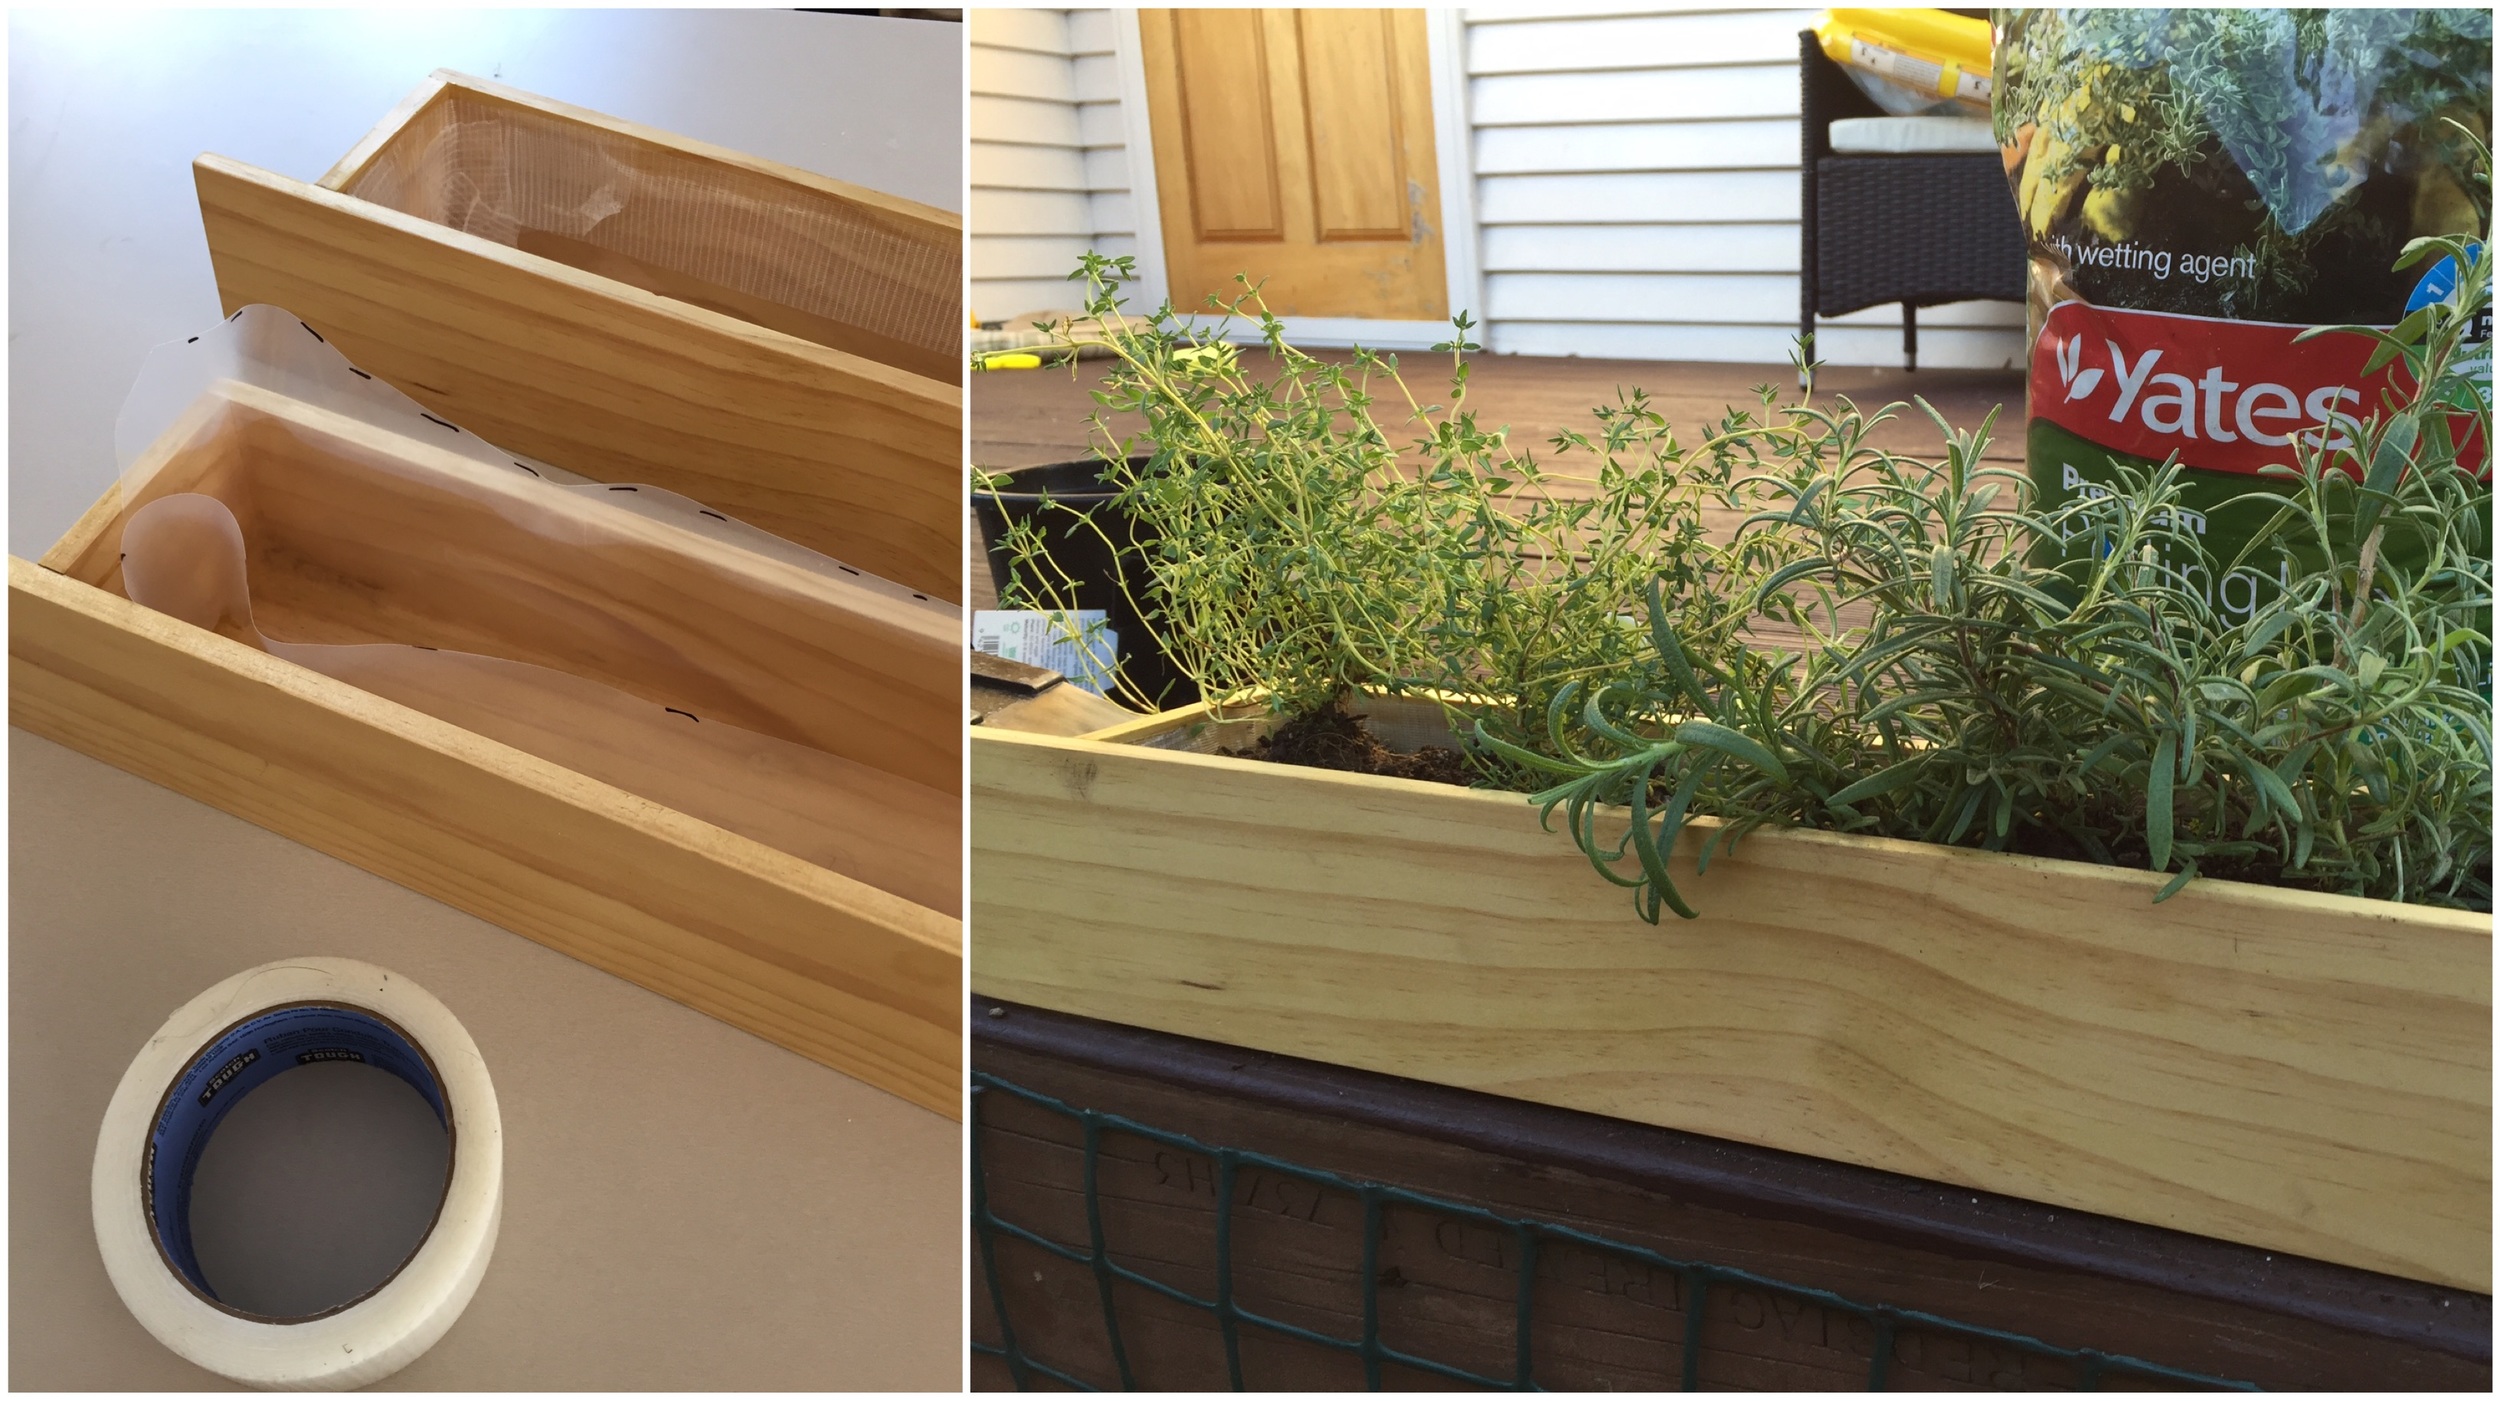
- Using polyurethane and waterproof tape, line the inside of your planter boxes to create a waterproof lining.
- Select the type of plants your after - edibles, colour, greenery, etc - and plant. Don't fill right up to the top edge, allow 15mm to make sure water or dirt doesn't fall out.
- Install planter boxes within your recess.
Materials Required:
- 90x10mm Pine, approximately one 1,800mm length per planter box
- Polyurethane and suitable tape for lining.
- Pin nails, timber adhesive
- Sandpaper
- Oil / stain / paint for finishing
- Plant selection and potting mix - to your preference
Tools Required
- Dropsaw (preferable, but skillsaw or handdsaw adequate)
- Clamps
- General tools (hammer, tape measure, level, etc)
Cost:
In total this would have cost me $70 to make for 4x planter boxes, excluding planting and making the recess. Each 1.8m piece of pine is $10, plus $30 for the lining, stain and fixings.
Timeframe:
4-6 Hours (excluding allowing stain to dry)
If you do make the planter boxes, we would love to hear how you went, any comments for improvement or alternative variations and of course some pictures of your finished product. Email them through or add your comments below.